;'>ClevelandWebDeveloper.com</span><br>I enjoy designing and developing websites and have been doing that for 20 years. I also make WordPress plugins.")
In this post I am going to walk you through how to make striking text headers with Visual Artist. I actually use this technique myself on my tutorials, including this one 🙂 Note that you will have to be using the Visual Artist add-on for Spacer in order to follow along with this tutorial.
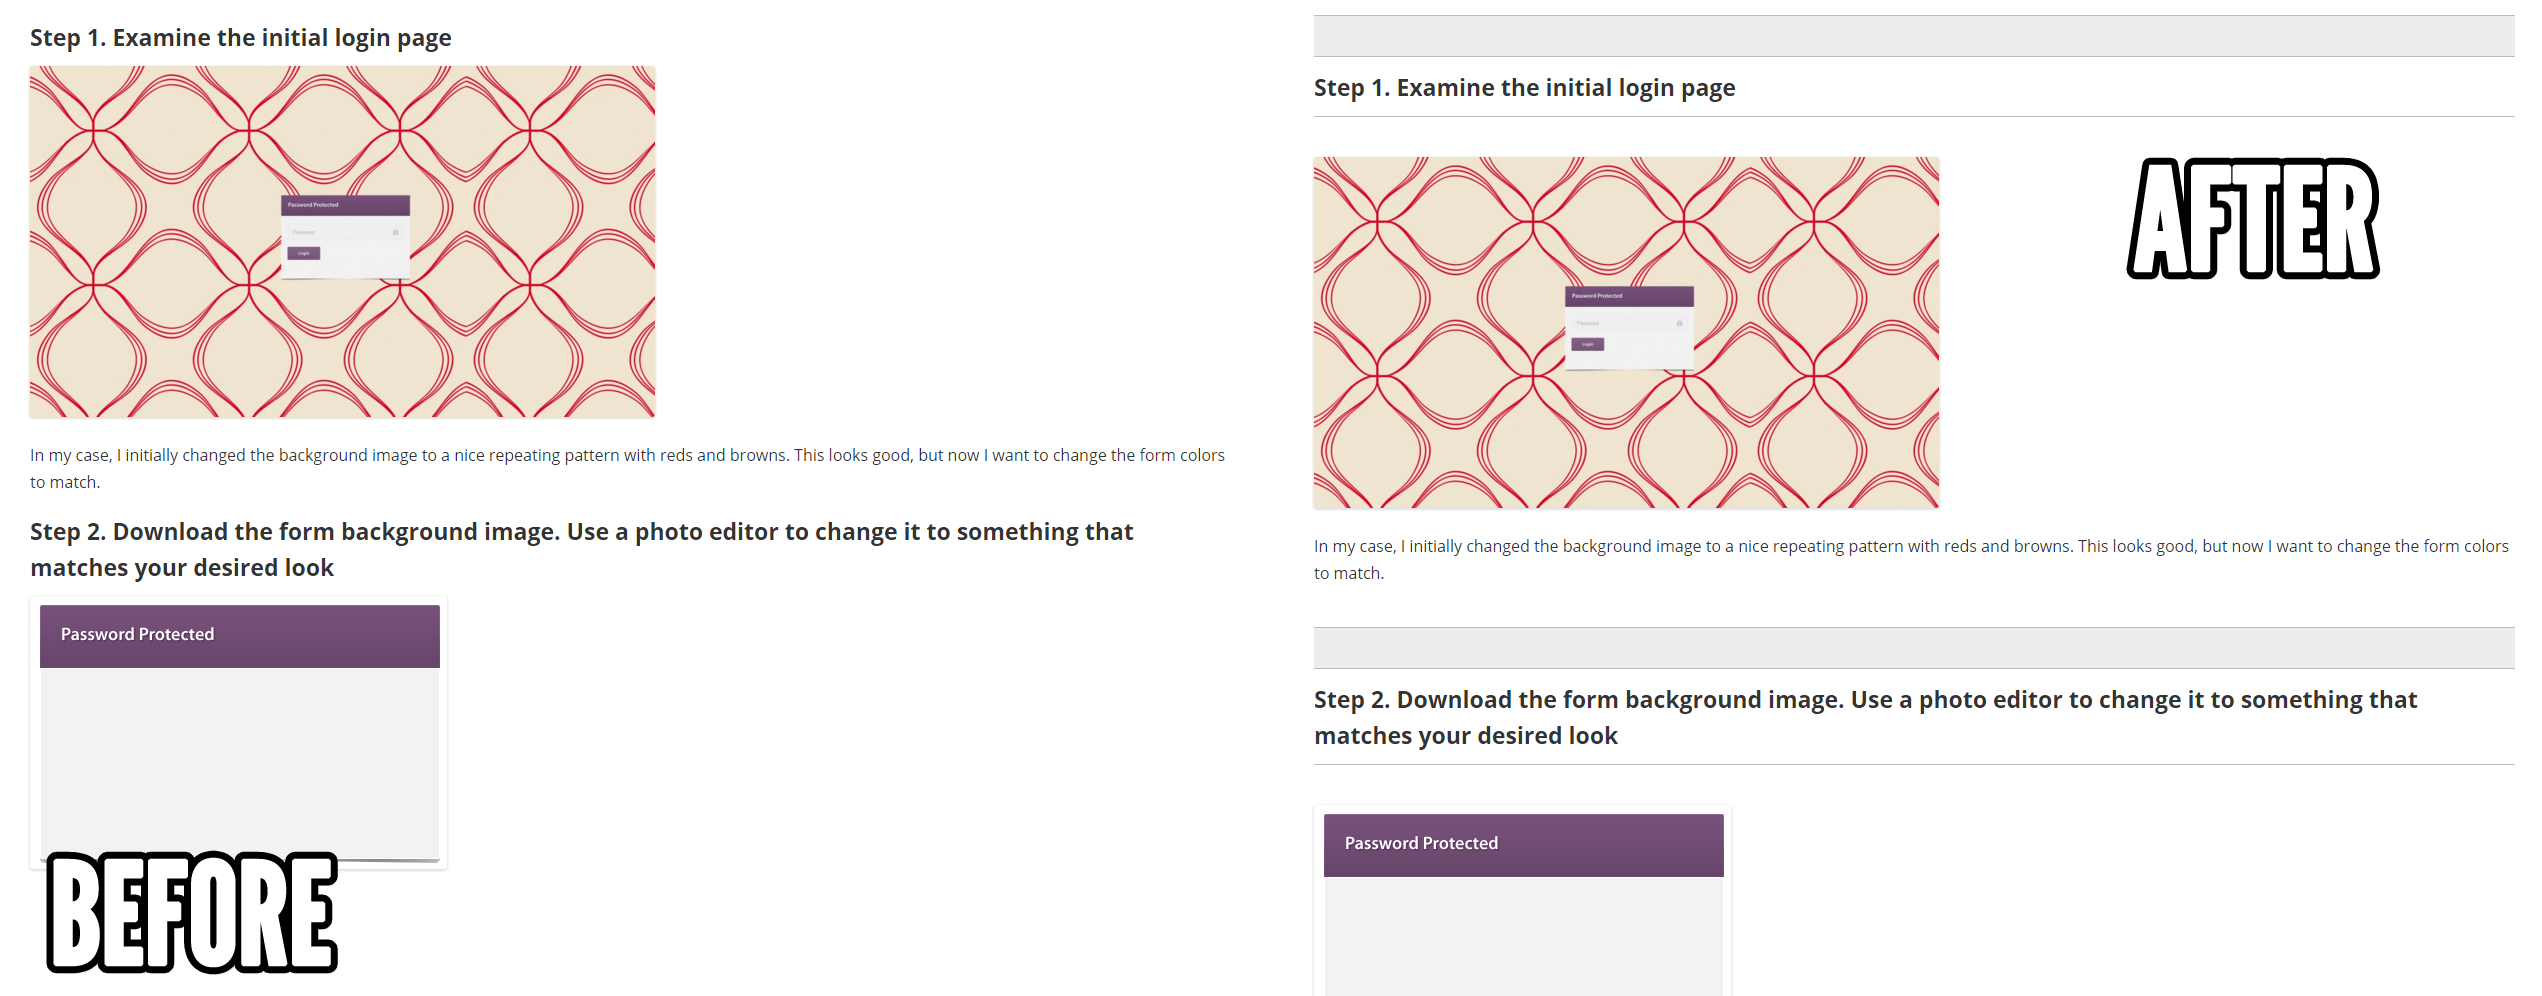
Before we get started, let’s take a look at the end goal…
Step 1. Set up the dividers
The first thing you need to do is create two new Spacer elements in Visual Artist. In your WordPress admin, go to Settings > Spacer > Add Spacers (top tab) > New Spacer.
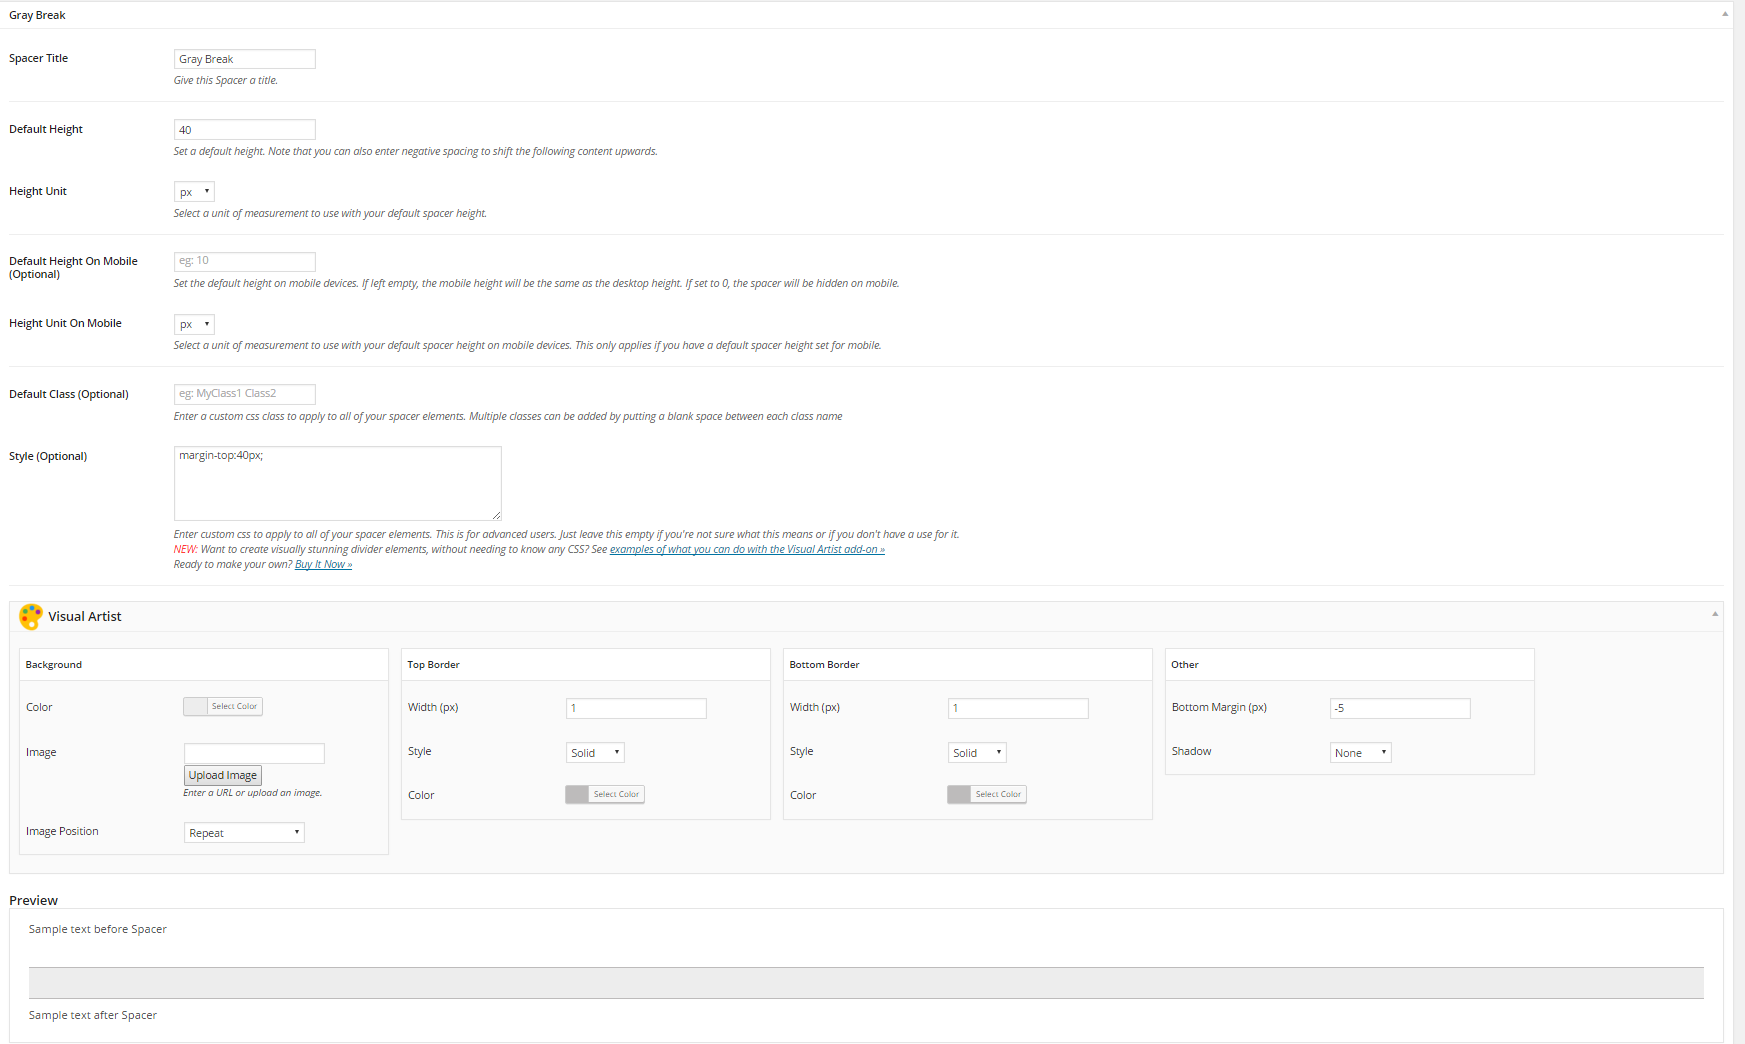
In my example, I started off with creating a Spacer named “Gray Break”. This is the line break element with the gray background that goes directly above the header text (ie Step 1, Step 2 in the before and after example image at the beginning of this post).
I set the height to 40 pixels and added a margin-top:40px; to the Style setting. The top margin will give some extra space before the divider and the preceding text, which will help to distinguish the new header from the previous section/paragraph.
In the Visual Artist panel, I set the background color to #ededed. Then I set the top border width and bottom border width both to 1 pixel. I gave them both a color of #bdbbbb. Finally, I set the bottom margin to -5 pixels to help keep the heading text more flush with the bottom of the element.
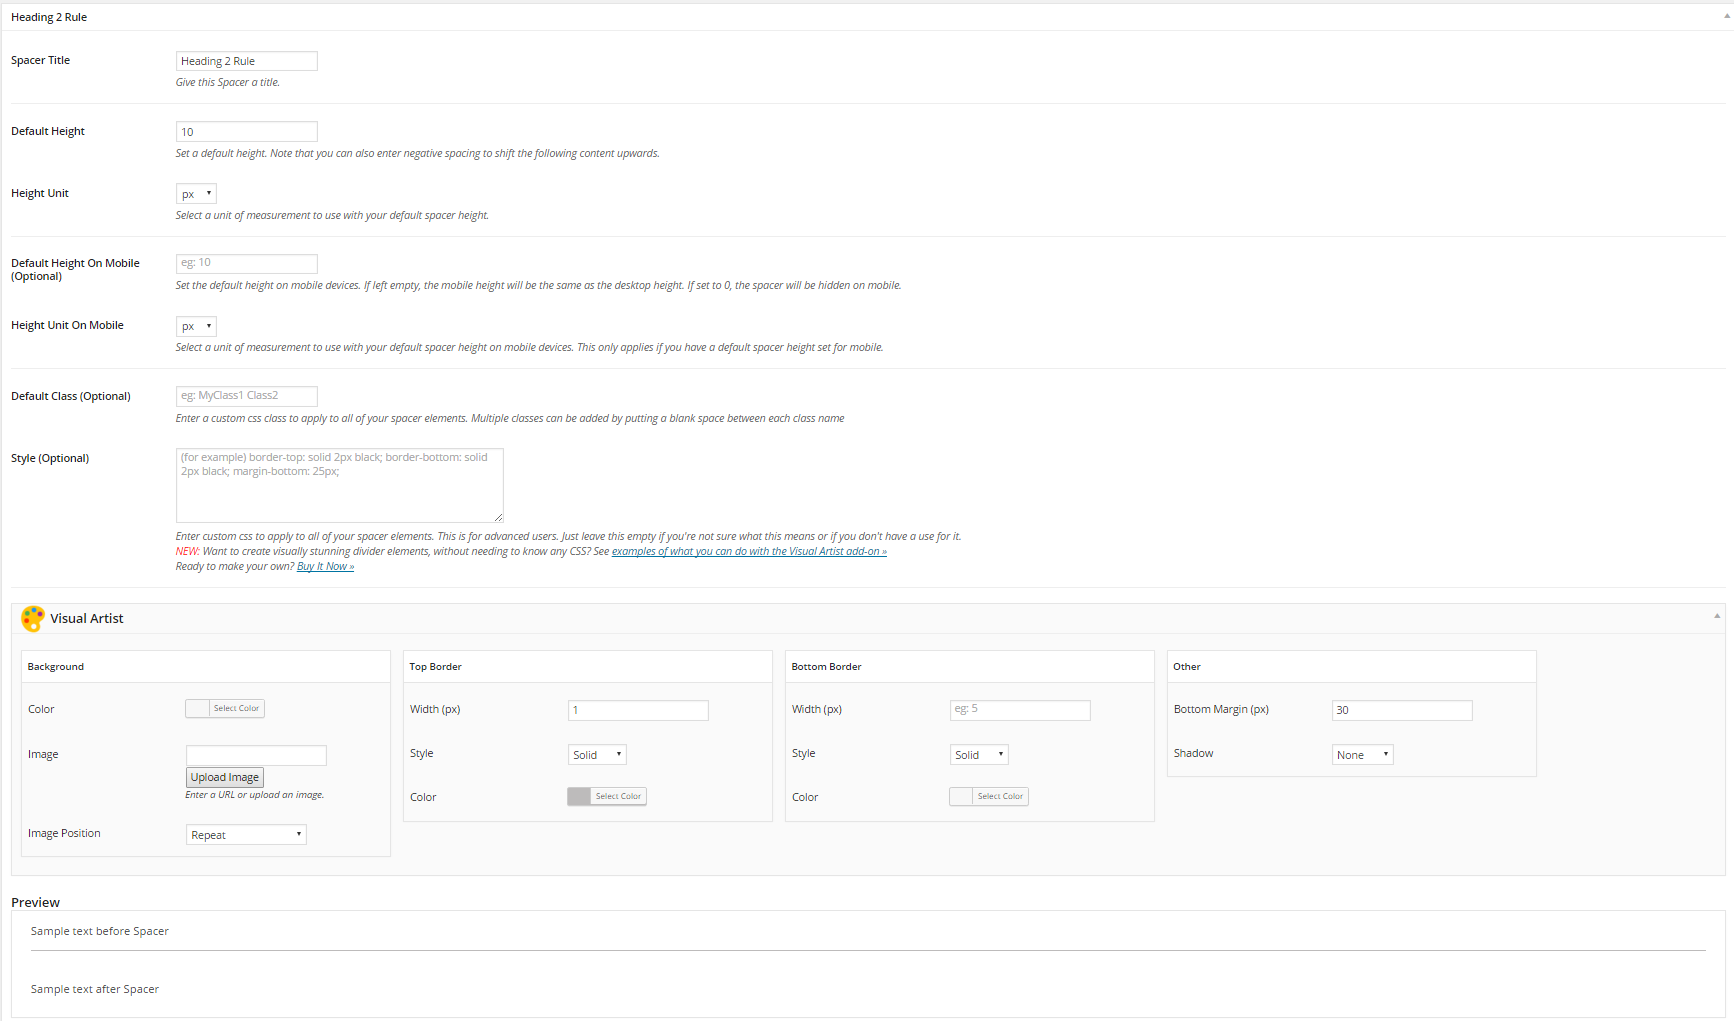
Next, I made another Spacer, this one named “Heading 2 Rule”. This is the gray line that goes directly beneath the header text (ie Step 1, Step 2 in the before/after example above).
I set the height to 10 pixels.
Down in the Visual Artist panel, I set the top border width to 1 pixel and set the color to #bdbbbb. Lastly, I added a bottom margin of 30 pixels to add some appropriate padding before the coming paragraph text begins.
Step 2. Add to posts/pages to give emphasis to your headers as needed
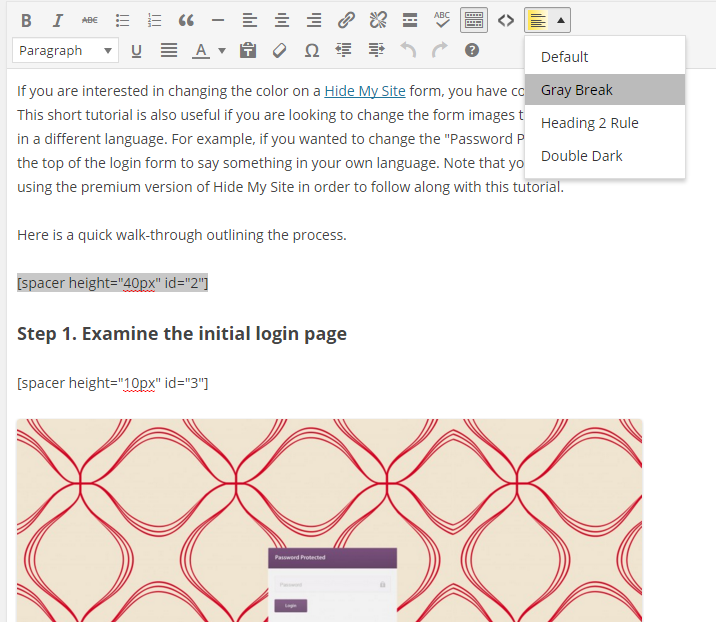
While writing my post, I added the “Gray Break” divider on the line before every heading text. I did this by clicking the Spacer icon and then selecting the “Gray Break” option (remember this is the name we gave it in step 1). On the line after every heading, I did the same but inserted the “Header 2 Rule” instead.
Step 3. Check out your final result and smile!
You have successfully created and implemented your own strong header elements using Visual Artist. Your headers are now looking even more distinguished and are organizing your paragraphs effectively. Way to go!
Thanks for taking the time to follow this tutorial. Hope you find it helpful. Please let me know if you have any questions or other feedback in the comments.
Related Posts
- Will Spacer be Gutenberg compatible?
- New Panels update allows you to set custom CSS for your panels
- How to download your plugin
- Download receipt option now available for all purchases
- Spacer: Draft It! Add-On
- Access your purchases, downloads, and license keys in the new My Account section
- How to install a spacer add-on
- Including a spacer within a panel
- Spacer: Panels Add-On
- Available line styles for your Line-On-Sides Headers