;'>ClevelandWebDeveloper.com</span><br>I enjoy designing and developing websites and have been doing that for 20 years. I also make WordPress plugins.")
In this post I am going to walk you through the process of creating and implementing Line-On-Sides Headers, step by step. Note that you will have to be using the Line-On-Sides Headers add-on for Spacer in order to follow along with this tutorial.
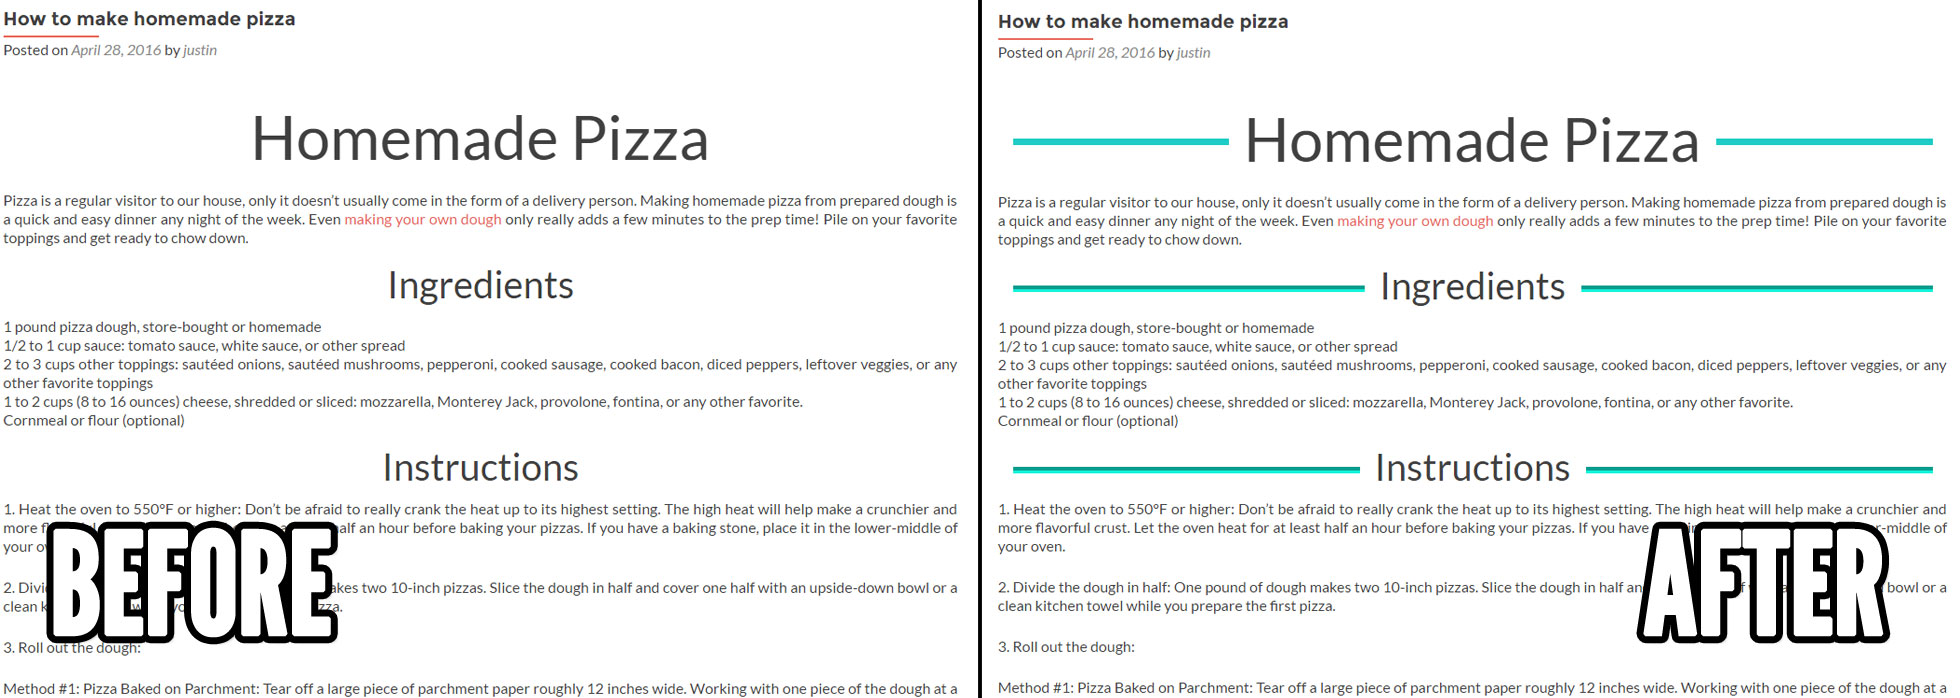
Before we get started, let’s take a look at the end goal…
Step 1: Create your first main header
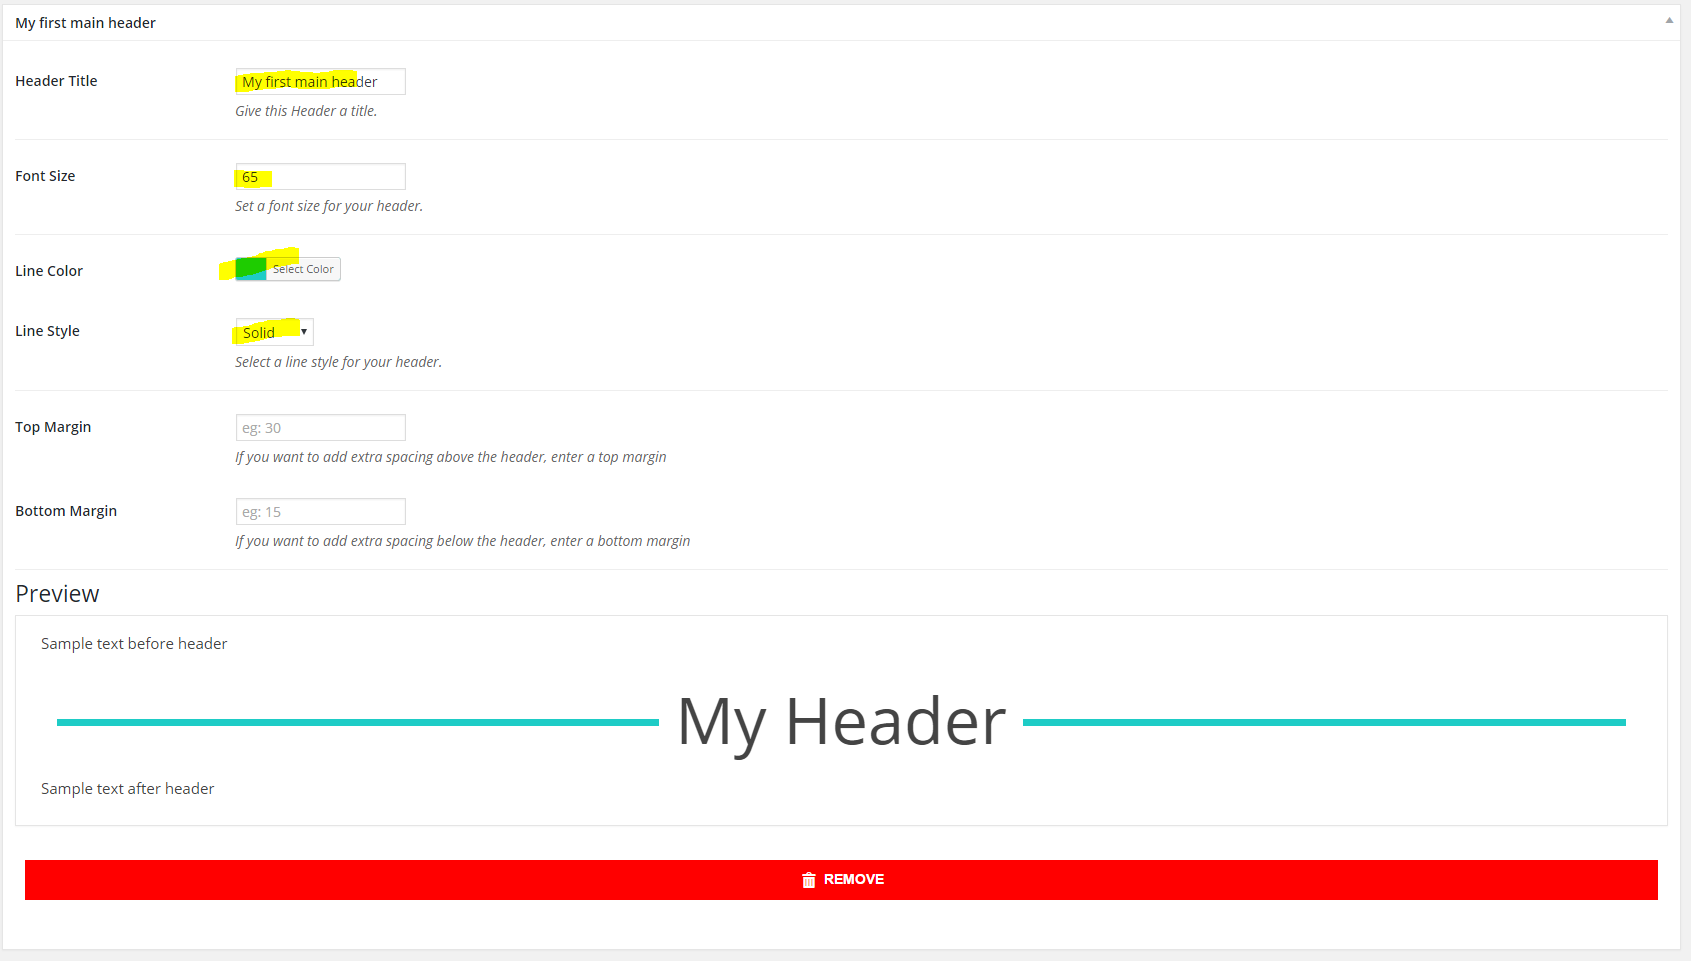
- In your WordPress admin > Settings > Spacer > Line-On-Sides Headers (top tab) > Click the blue “New Header” button
- Give your header a title. In my example, I called mine “My first main header”.
- Set the header font size. I decided on 65 pixels, which is a nice large size that is suitable for a main header.
- Select a line color using the color picker. I chose a shade of light blue.
- Choose a line style. Your options include solid (a solid line), double (a double line), dotted (a dotted line), dashed (a dashed line), groove, and ridge (both groove and ridge will produce a two-colored line based on your line color selection). I set my line style to solid.
- If you want, you can set a top margin and bottom margin. This will add spacing before and after your header, respectively. I left these empty for my header.
Next, you are going to create your first subheader.
Step 2: Create your first subheader

- In your WordPress admin > Settings > Spacer > Line-On-Sides Headers (top tab) > Click the blue “New Header” button
- Give your header a title. In my example, I called mine “My first subheader”.
- Set the header font size. I decided on 40 pixels: since the main header is set to 65 pixels, it makes sense to use a smaller font size for my subheader.
- Select a line color using the color picker. I chose a similar shade of light blue.
- Choose a line style. I set my subheader line style to groove to give it a nice multi-color effect.
- If you want, you can set a top margin and bottom margin. This will add spacing before and after your header, respectively. I left these empty for my subheader.
- Click the green “Save Changes!” button at the bottom of the page.
Now that you have your headers built, it’s time to use them in your post/page.
Step 3: Insert main header into post
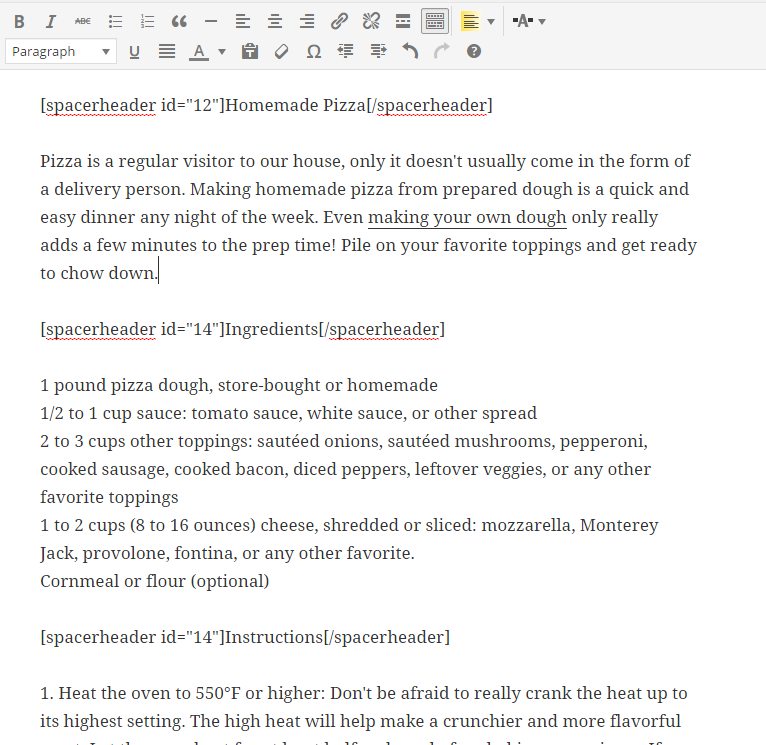
For the sake of our example, let’s assume you are writing a post about making Homemade Pizza. Let’s also suppose that there are two main sections to your post: one called Ingredients and another called Instructions.
- Open up a new post. In the WYSIWYG Visual Editor toolbar, click the Line-On-Sides Headers icon
 and select the main header you created in step 1. Mine was called “My first main header”.
 - When you insert the header, the header text will initially be set to “My Header”. Keeping with our example outlined above, let’s change that to say “Homemade Pizza” instead.
- Enter any text, images, or additional content that you want to go after the main header.
Step 4: Insert subheader into post
Now let’s move on to your subheaders. The first is called Ingredients.
- Click the Line-On-Sides Headers icon and select the subheader you created in step 1. Mine was called “My first subheader”.
- When you insert the header, the header text will initially be set to “My Header”. Change that to say “Ingredients” instead.
- Enter the ingredients that you want to go after the subheader.
- Repeat the proceeding three steps for the Instructions section as well.
If all goes well, your post write-up should now look like this:
Step 5: Admire your handywork
When you view your post, you should now have something that looks like the ‘after’ shot of the following image:
Congratulations, you have set up your own line-on-sides headers. Not only are your posts now more visually appealing, but they are also easier for your readers to follow. Way to go!
Thanks for taking the time to follow this tutorial. Hope you find it helpful. Please let me know if you have any questions or other feedback in the comments.
Related Posts
- Will Spacer be Gutenberg compatible?
- New Panels update allows you to set custom CSS for your panels
- How to download your plugin
- Download receipt option now available for all purchases
- Spacer: Draft It! Add-On
- Access your purchases, downloads, and license keys in the new My Account section
- How to install a spacer add-on
- Including a spacer within a panel
- Spacer: Panels Add-On
- Available line styles for your Line-On-Sides Headers