

;'>ClevelandWebDeveloper.com</span><br>I enjoy designing and developing websites and have been doing that for 20 years. I also make WordPress plugins.")

Did you ever want to create panels in your WordPress blog posts? Now, if you find yourself asking the question “What are panels?” we first need to address that.
And here is an example of a panel with a header…
Panels provide a great way for you to interact with your users in friendly, engaging callout boxes. They can effectively convey important information, alerts, and any type of message that you want to make sure your readers will notice.
How To Create Your Panels
The video below provides a quick demonstration of how to create your Panels. For a more detailed walk-through, please see the step by step guide at the end of this post.
Step By Step Instructions
Step 1: Create your first panels
- In your WordPress admin > Settings > Spacer > Panels (top tab) > Click the blue “New Panel” button
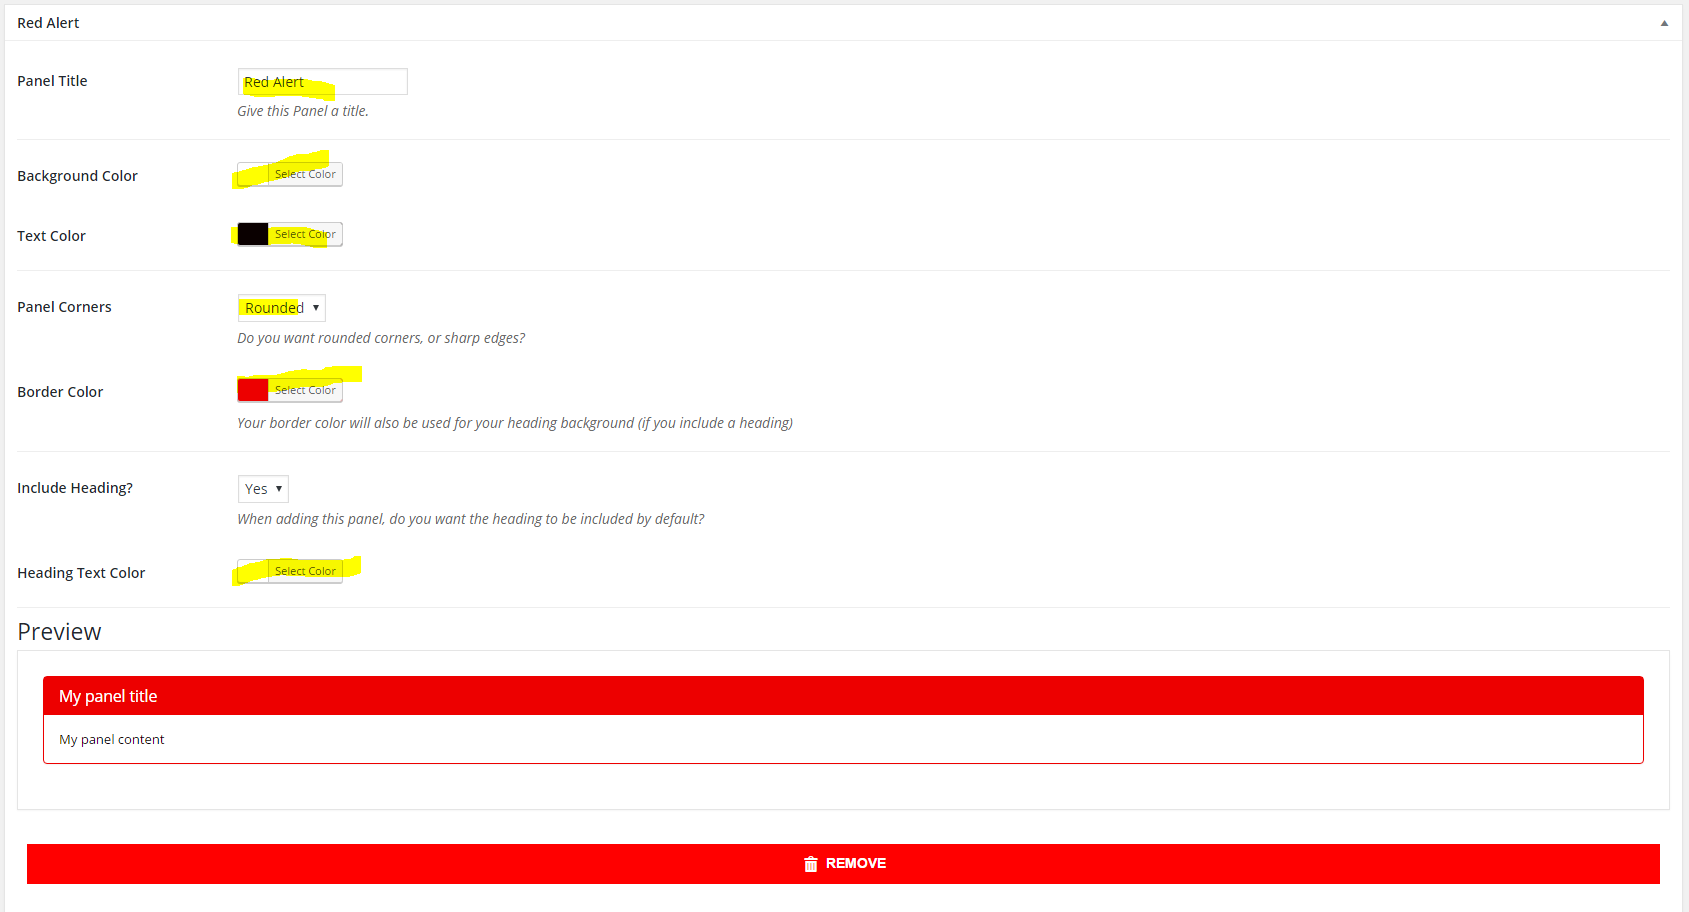
- Give your panel a title. In my example, I called mine “Red Alert”.
- Set the “Background Color” which will be used as the background for the panel content. I went with white
- Select the text color to be used for the panel. I chose black.
- You can choose to have the panel corners rounded or sharp. Rounded will give a rounded rectangle shape for your panel, whereas sharp will give you a traditional rectangle shape. I left mine rounded.
- Choose a border color for your panel. I went with red.
- Choose if you want to include a heading area for your panel. The border color chosen in the previous step will be used for the heading background color. In my case, the red I chose in step 6 conveys an appropriate sense of “danger” when used as the heading background color.
- Choose your heading text color. I went with white for this as well.
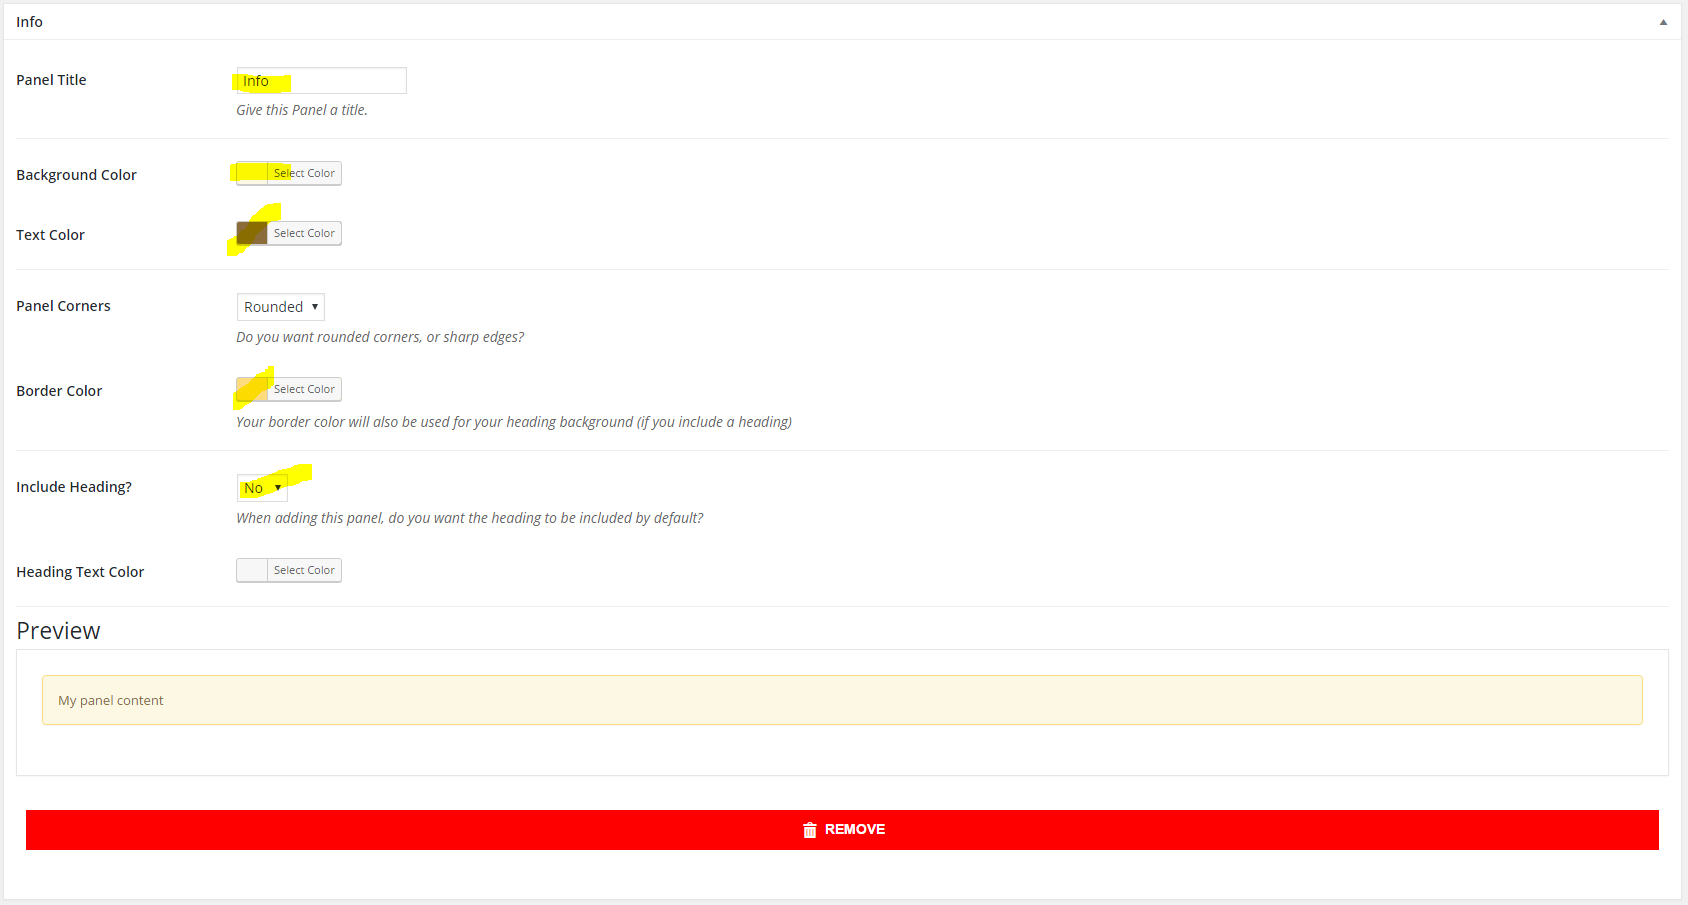
In my case, I also created another panel called info. This panel does not include a heading. Here is how that one was set up:
Next, you are going to insert your panels into a post.
Step 2: Insert panels into your post
For the sake of this example, let’s assume you are writing a post about how to make chicken wings. Suppose you want to add a “red alert” notice to warn your readers not to add too much spicy chili powder, and also an info panel to suggest a nice side dish.
- While editing your post, go to the spot where you want to add the alert. In the WYSIWYG Visual Editor toolbar, click the Panels icon
 and select the panel you created in step 1. Mine was called “Red Alert”.
 - When you insert the panel, the panel content text will initially be set to “Panel Content”. Let’s change that to say “Don’t add a lot of chili powder or it will turn out too spicy.”
- The panel heading text will initially be set to “Panel Heading”, so let’s change that to “Be Careful!” instead.
- No go to the spot where you want to suggest the dish. Click the panels icon and select the info panel you created in step 1. Mine was called “Info”.
- Change the panel content to “Did you know? This dish goes great with some celery.” Since this panel doesn’t have a heading, you don’t have to set a heading text for it.
If all goes well, your post write-up should now look something like this:

Step 3: See your panels in action!
When you view your post, you should now see something like the following image:
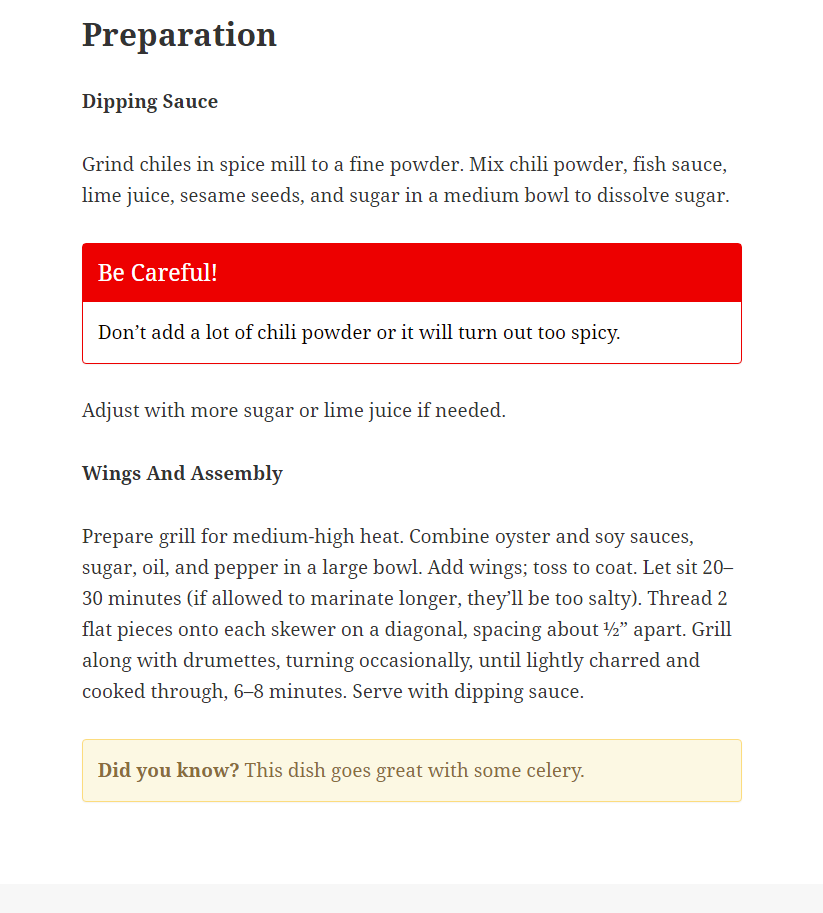
Great job – you have now set up and implemented your own panels. See how easy that was to make your posts more readable and interesting?
Premium Support
Need help with setup? Just send a message
Related Posts
- Will Spacer be Gutenberg compatible?
- New Panels update allows you to set custom CSS for your panels
- How to download your plugin
- Download receipt option now available for all purchases
- Spacer: Draft It! Add-On
- Access your purchases, downloads, and license keys in the new My Account section
- How to install a spacer add-on
- Including a spacer within a panel
- Available line styles for your Line-On-Sides Headers
- Changing the text color for a Line-On-Sides Header


Thanks, Justin, for great plugin…