;'>ClevelandWebDeveloper.com</span><br>I enjoy designing and developing websites and have been doing that for 20 years. I also make WordPress plugins.")
If you are looking at using your company logo, or any image for that matter, in a divider, this walk-through will show you how. Note that you will have to be using the Visual Artist add-on for Spacer in order to follow along with this tutorial.
Before we dive in to the guide, here is a look at what we are working towards…

Step 1. Locate company logo image

In my example, this is the logo image that I used to start off with. For the purpose of this tutorial, you can consider me Allie Spencer – Photographer Extraordinaire
Step 2. Decorate the image to your desired look
![]()
Using photoshop or your photo editor of choice, edit the image to so that it looks nice as a divider. You could also skip this step if you don’t want to make any changes. In my case, I added a divider line around the logo at a slight slant.
Step 3. Set up the divider using Visual Artist
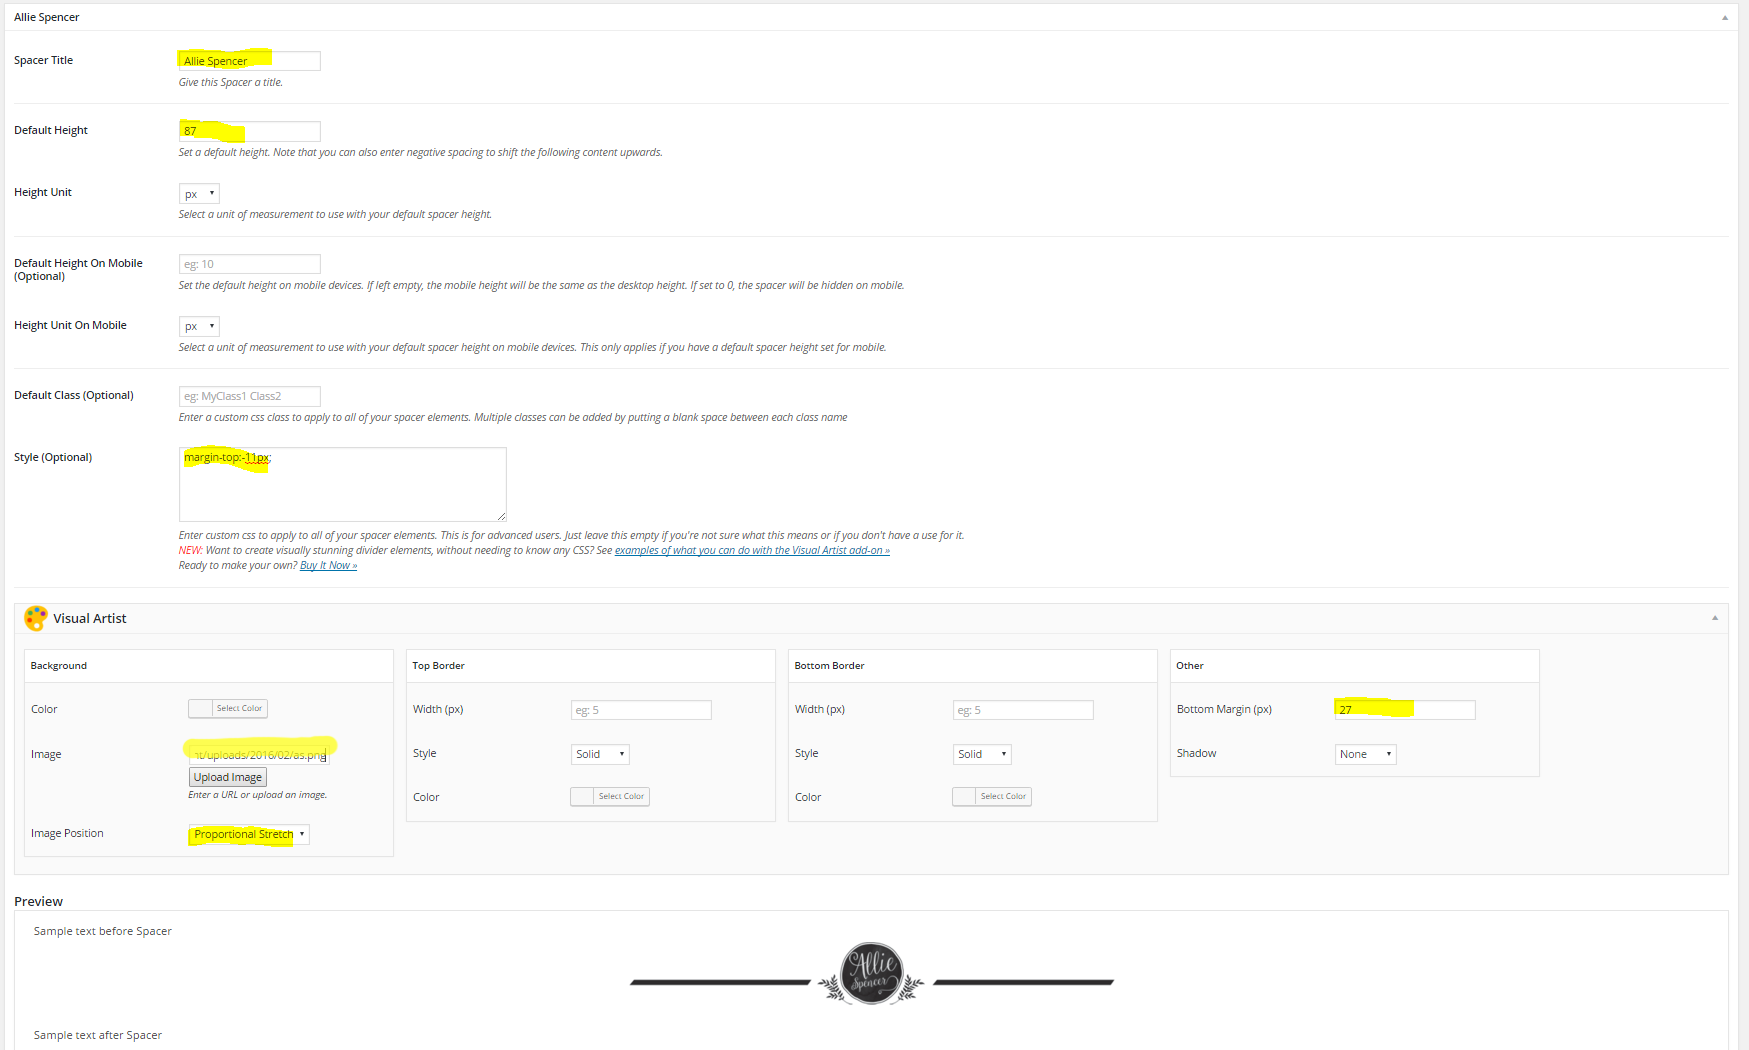
In your WordPress admin, go to Settings > Spacer > Add Spacers (top tab) > New Spacer. I named mine “Allie Spencer” and gave it a height of 87 pixels because I thought that looked nice, but you can play around with the height to see what works best for you.
I expanded the Visual Artist section and uploaded the image created in Step 2. Then I set the Image Position field to Proportional Stretch. This allows the divider to be centered and the divider image to scale to the full height of the Spacer.
I set the bottom margin to 27 and finally I entered margin-top:-11px; to the Style field because I wanted the divider to get nudged upwards a little.
Step 4. Add it to posts/pages

While writing my post, I added the divider where it was appropriate to break up the text. I did this by clicking the Spacer icon and then selecting the “Allie Spencer” option (remember this is the name we gave it in step 3).
Step 5. Admire your work!
After getting everything up and running, you deserve a big pat on the back for your efforts. Your site is now organized and looking great. Good for you!
Thanks for taking the time to follow this tutorial. Hope you find it helpful. Please let me know if you have any questions or other feedback in the comments.
Related Posts
- Will Spacer be Gutenberg compatible?
- New Panels update allows you to set custom CSS for your panels
- How to download your plugin
- Download receipt option now available for all purchases
- Spacer: Draft It! Add-On
- Access your purchases, downloads, and license keys in the new My Account section
- How to install a spacer add-on
- Including a spacer within a panel
- Spacer: Panels Add-On
- Available line styles for your Line-On-Sides Headers