;'>ClevelandWebDeveloper.com</span><br>I enjoy designing and developing websites and have been doing that for 20 years. I also make WordPress plugins.")
Included with the latest update to Spacer Panels is the ability to to set custom CSS for your panels. If you update to the latest version 1.0.1 of the add-on (In your WP admin > Plugins > Spacer – Panels, click ‘update now’), you can start taking advantage of this new feature.
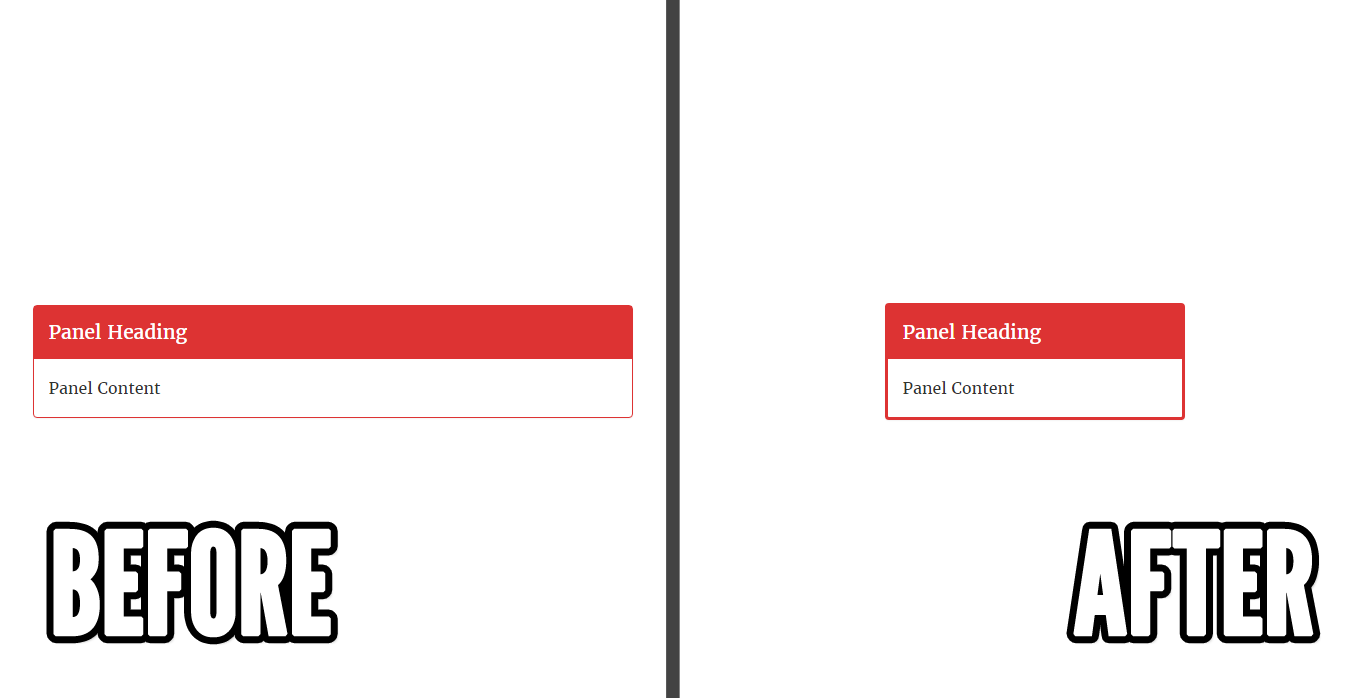
The End Result
Before we get started, here’s a look at what you might do with the new update.
For all instances of a panel
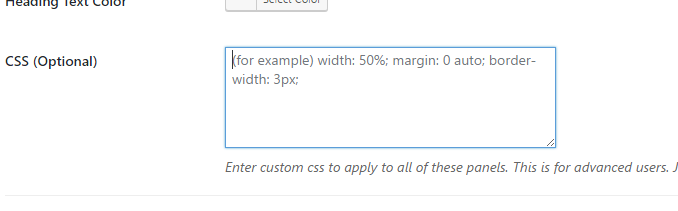
The new update allows you to set custom CSS for your panels via the admin page. You can use this to modify your panel borders, panel width, and more. For example, you could use the following code to set the panel to 50% width, make it centered, and give the panel border a width of 3px. To do this, enter the code in your WordPress admin > Spacer > Panels (top tab) > Select Panel > CSS: width:50%;margin:0 auto;border-width:3px;
For a specific instance of a panel
Suppose you want to customize a specific instance of a panel, but leave all other instances of that panel on your site unchanged. You can do this by adding a style attribute to the shortcode for that panel. For example, if you wanted to give a panel a 10px panel border, the shortcode would look like this:
|
1 |
[spacerpanel id="8" headingtext="Panel Heading" style="border-width:10px;"]Panel Content[/spacerpanel] |
If you need help with CSS, please send a message and I can try and point you in the right direction.
Thanks for taking the read this quick Spacer Panels update. Hope you find it helpful. Please feel free to share in the comments how you end up implementing the new feature on your site.
Related Posts
- Will Spacer be Gutenberg compatible?
- How to download your plugin
- Download receipt option now available for all purchases
- Spacer: Draft It! Add-On
- Access your purchases, downloads, and license keys in the new My Account section
- How to install a spacer add-on
- Including a spacer within a panel
- Spacer: Panels Add-On
- Available line styles for your Line-On-Sides Headers
- Changing the text color for a Line-On-Sides Header