;'>ClevelandWebDeveloper.com</span><br>I enjoy designing and developing websites and have been doing that for 20 years. I also make WordPress plugins.")
This tutorial will outline in brief how to add divider lines in WordPress. Divider lines are also known as section breaks, line breaks, spacers, thought breaks, paragraph breaks, chapter breaks, and can go by many other names as well.
In fact, one option that you have is to use the Horizontal line button in the Wysiwyg visual editor within WordPress for creating divider lines.
This tutorial, however, will outline the process using the Visual Artist method. Visual Artist is an add-on for the Spacer plugin, so you will need both Spacer and Visual Artist running on your WordPress site in order to follow along.
The benefit of using the Visual Artist method is that it allows you to easily create fancy divider lines, ornate section breaks, and beautiful spacer elements that incorporate vibrant colors and custom images. Unlike the horizontal line button, you don’t have to know CSS or how to code in order to create stylish line dividers using Visual Artist.
In this example, we will be making a divider line using an image.
Step 1. Find an image you want to use

I went with a typographic element known as a flueron. After you have the image saved on your computer, you are ready to create your spacer.
Step 2. Create your Spacer using the image
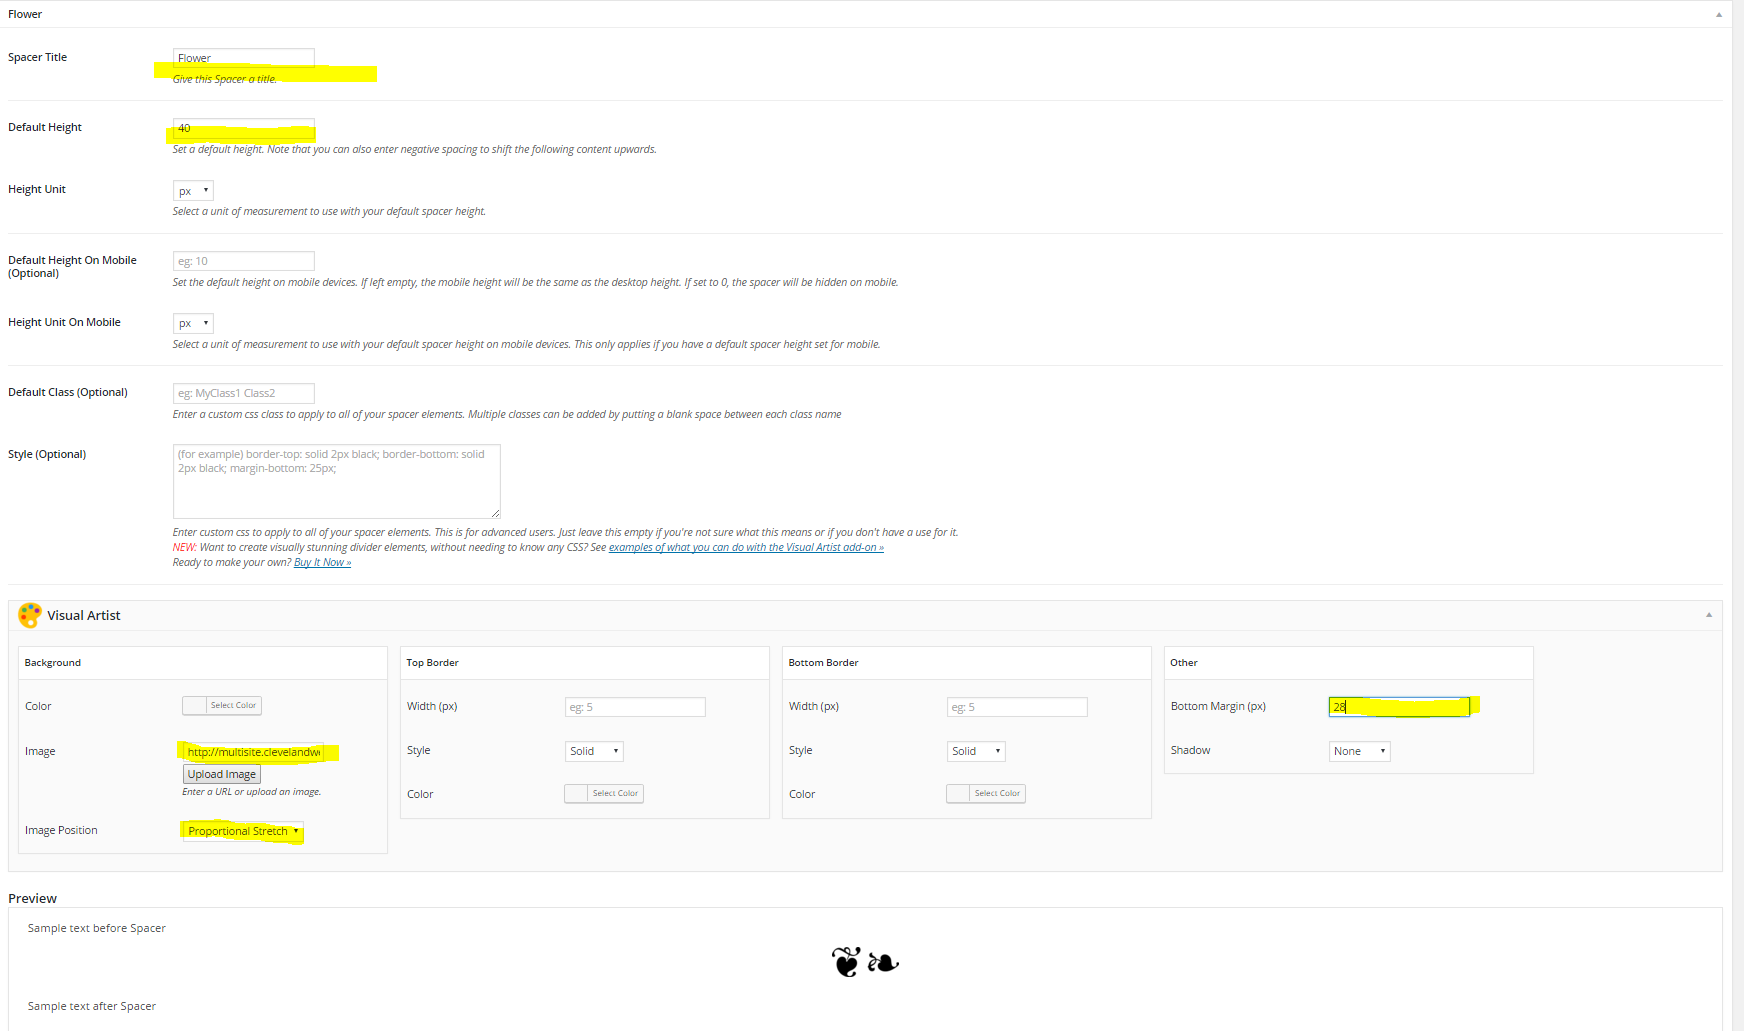
Navigate to the Spacer settings page which can be found in your WordPress admin > Setttings > Spacer. In the top tabs, click the “Add Spacer” tab, and then click the blue “New Spacer” button at the bottom of the page.
Give your spacer a name that will help you remember it. I called mine “Flower”. I gave the Spacer a default height of 40 pixels. This will vary depending on the image you choose and how you want your divider to look.
In the Visual Artist console, I uploaded my image and set the position to Proportional Stretch. This centers my background image in the middle section, and will also scale my image proportionally to match the default height (in this case, 40 pixels). Finally, I set the bottom margin to make sure there was space added after the divider. Often times in WordPress, themes will add a margin before your spacer but there will be no margin spacing after it. You can use this Bottom Margin setting to adjust the Spacer so that there is equal spacing before and after the divider. These settings should be tweaked based on your desired look and theme.
Save your new Spacer.
Step 3. When writing, select the divider you created

Click the Spacer button and choose the divider that you just made. All of the spacers and dividers that you create will appear here. Oh yeah, I called mine “flower”, so I’ll pick that one!
Step 4. Admire your fancy new line divider
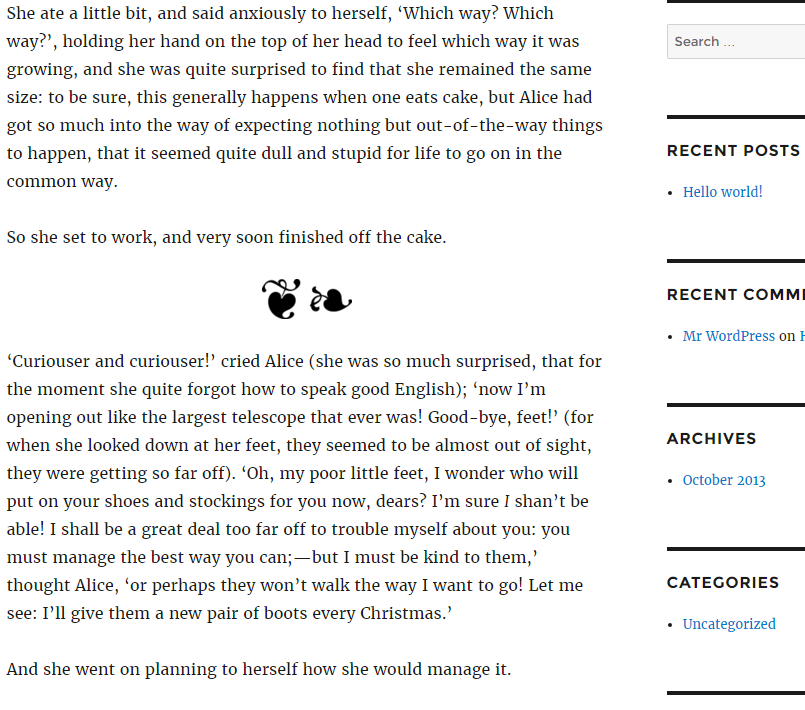
Our new flueron breaks up the text nicely. Hurray for a job well done 🙂
There is a lot more that you can do with Visual Artist, but this should get you off to a good start. Thanks for taking the time to follow this tutorial. Hope you find it helpful. Please let me know if you have any questions or other feedback in the comments.
Related Posts
- Will Spacer be Gutenberg compatible?
- New Panels update allows you to set custom CSS for your panels
- How to download your plugin
- Download receipt option now available for all purchases
- Spacer: Draft It! Add-On
- Access your purchases, downloads, and license keys in the new My Account section
- How to install a spacer add-on
- Including a spacer within a panel
- Spacer: Panels Add-On
- Available line styles for your Line-On-Sides Headers