;'>ClevelandWebDeveloper.com</span><br>I enjoy designing and developing websites and have been doing that for 20 years. I also make WordPress plugins.")
One question that we are often asked is “How can I use Hide My Site to password protect only some pages?” If you are interested in keeping your website open to the public, but at the same time would like to password protect specific pages and posts with Hide My Site, then read on.
Note that you will have to be using Hide My Site Multipass version Professional and above in order to follow along with this tutorial.
Here is a quick walk-through outlining the process.
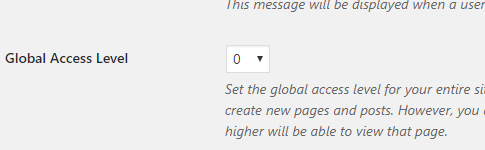
Step 1. Set Global Access Level to 0
In your WP admin > Settings > Hide My Site > General > Global Access Level > Set to 0.
Once this is done, your site will be open to the public
Step 2. Set a higher access level on a specific page or post.
While editing a page or post in your WordPress admin, navigate down to Hide My Site Options > Access Level. Set this to any number higher than 0. Let’s suppose you set this to 2.
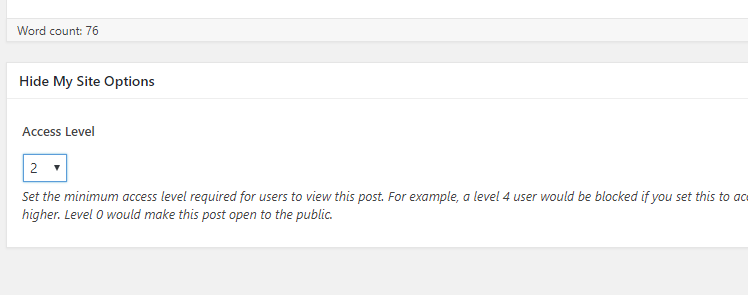
From now on, when the public tries to view this page, the page will be blocked and they will be prompted to enter a password.
Step 3. Create a password with sufficiently high access level and give this password to your desired audience.
In your WP admin > Settings > Hide My Site > Top tabs > Click “+ Passwords”. To expand the option panel for an existing password, click on the password. Otherwise click the “+ New Password” button to create a new password.
Set the access level for this password to 2 or higher, save the password (make sure to fill out the other password settings as normal), and give the password to your desired website visitors.
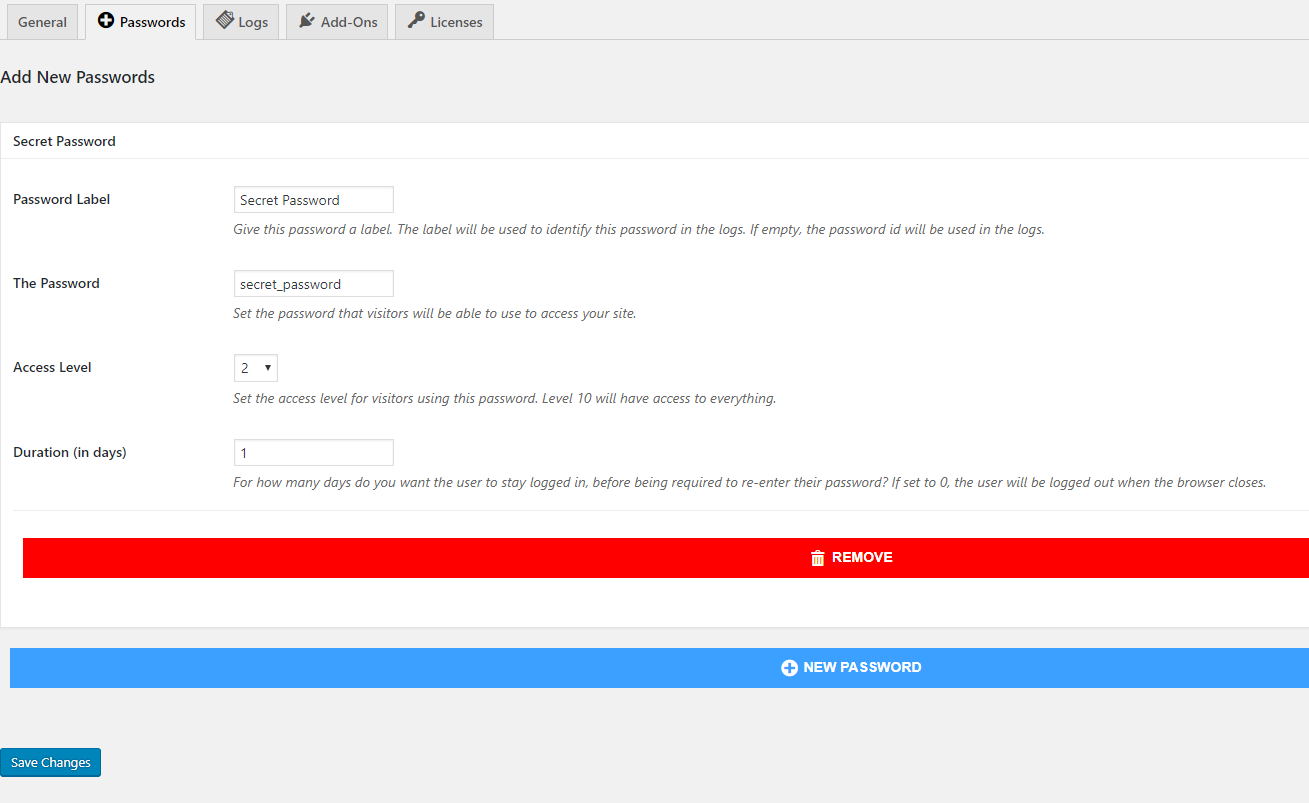
Since the page that we created in step 2 has the access level set to 2, users of this password will be able to view that page. Meanwhile, the general public (access level 0) will be blocked from viewing the page and will be prompted to enter a password in order to view it.
Thanks for taking the time to follow this tutorial. Hope you find it helpful. Please let me know if you have any questions or other feedback in the comments.
Related Posts
- Hide My Site Multipass
- Hide My Site Custom Login Page Examples #2
- Hide My Site Custom Login Page Examples
- Hide My Site Bypass URL
- Hide My Site Redirect
- Hide My Site
- New feature added to Multipass – Clear All Logs
- What’s new in Hide My Site version 2.1
- Will Hide My Site be Gutenberg compatible?
- How to add a hyperlink to your Hide My Site login page