;'>ClevelandWebDeveloper.com</span><br>I enjoy designing and developing websites and have been doing that for 20 years. I also make WordPress plugins.")
Want to increase your sales?
One potential use for Hide My Site Multipass is that it allows you to send prospective clients/customers unique login passwords. You can then use this to track which clients/customers log in down the line, so that you can later follow up with these ‘hotter’ leads.
This post outlines this basic steps for how this would work.
Step 1: Send a different password to all your leads
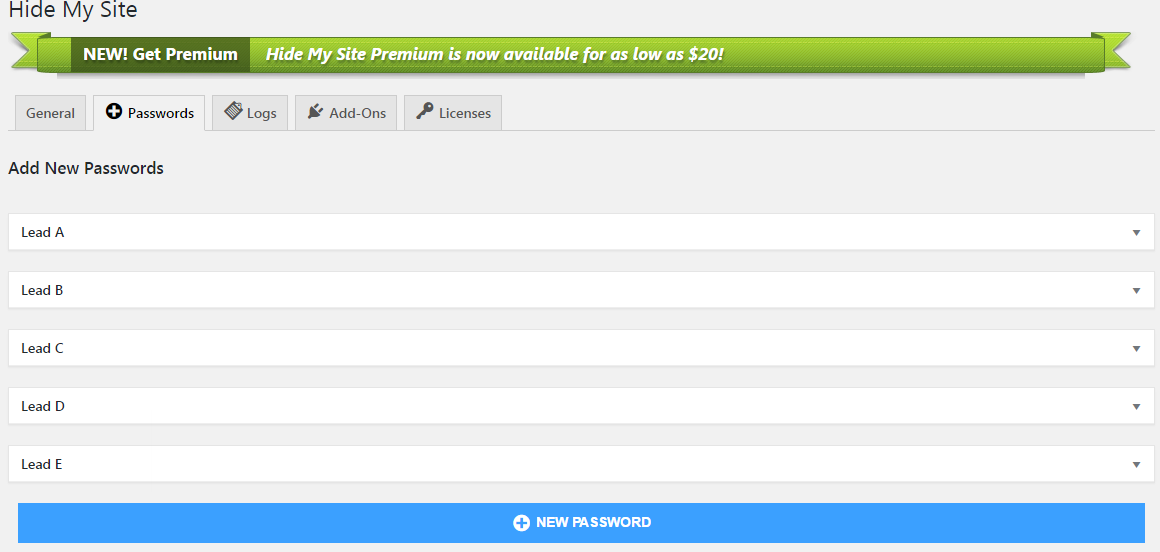
For the sake of this example, let’s say that you want to send out five passwords to five different leads: Lead A, B, C, D, and E. To do this, you would first create five new passwords in your WordPress admin > Settings > Hide My Site > Passwords. Label the first password Lead A, the second password Lead B, and so on. This is how that would look:
Step 2: Check to see which leads log in to your site
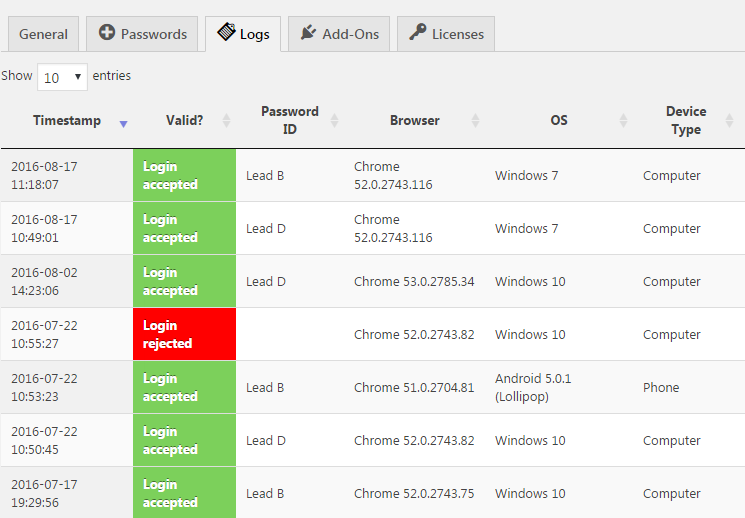
Site logins are recorded in the log (WordPress admin > Settings > Hide My Site > Logs). Here, you can see which are the leads that followed up and visited your site.
Step 3: Follow up with leads who didn’t log in
It turns out that leads B and D are the only ones with activity on your site. Leads A, C, and E never logged in and accessed your site. Notice in the log that there was a rejected login attempt. Perhaps one of your leads was trying to access your site but was having difficulty. Consider reaching out to A, C, and E with a friendly email checking in to see if they lost your password, or otherwise had any trouble logging in to your site.
Step 4: Follow up with leads who DID log in
Because leads B and D were so busy on your site, it would be wise to follow up with them immediately: These are the ones who are likely getting ready to purchase your product.
Thanks for taking the time to follow along with this tutorial. I hope you find it helpful. Please let me know if you have any questions or other feedback in the comments.
Related Posts
- Hide My Site Multipass
- Hide My Site Custom Login Page Examples #2
- Hide My Site Custom Login Page Examples
- Hide My Site Bypass URL
- Hide My Site Redirect
- Hide My Site
- New feature added to Multipass – Clear All Logs
- What’s new in Hide My Site version 2.1
- Will Hide My Site be Gutenberg compatible?
- How to add a hyperlink to your Hide My Site login page